
At the beginning of June I held my Stampin’ UP! 2019 -2020 Catalog launch. Everyone made a couple of make-n-takes, got their copy of the new catalog and a little gift from me to thank them for coming and their on-going support for my card-crafting business.
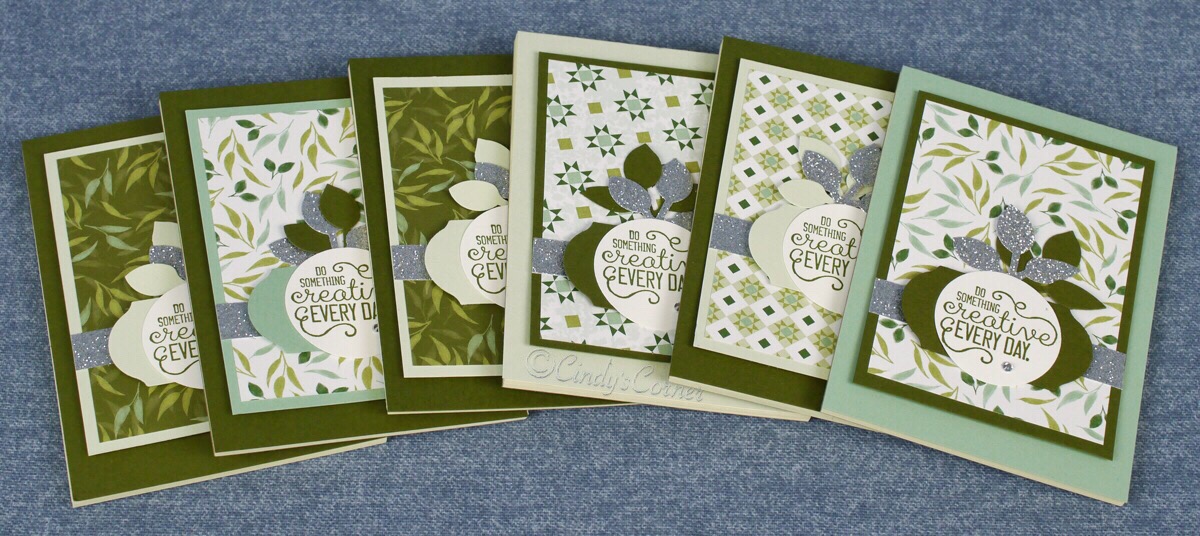
The gift was a little decorated notepad showcasing the new Garden Lane Designer Series Paper as well as the new Timeless Label Punch. This has to be one of my most favorite papers in the new catalog – I just love all the fresh greens and how they all work so beautifully together…….. and don’t get me started on the Timeless Label Punch – I don’t think it has been out of my hands since the UPS man delivered it!
The little notepads measure 5 x 3 1/2 and are 3/16 thick, for this size I cut the cover 6 x 3 1/2 – this is the width of the notepad then the length plus 1″ for attaching it to the back of the pad. I scored @ 3/4 then @ 15/16 (I can hear you going uugghhh but my paper trimmer has 1/16 markings and if you have the Stampin’ UP! trimmer then so will yours 🙂 )
When attached to the notepad it leaves a 1/16 overhang on the bottom edge of the pad which makes it very easy to open!
I used Tear and Tape double sided tape to attach this to the back of the notepad – this provides a strong bond – I would hate it to fall apart on the first use!
You can see I have selected various of the greens within the DSP to make covers and the decorative layers, Mossy Meadow, Mint Macaron, Soft Seafoam.
Layer 1: 4 1/4 x 3 Card
Layer 2: 4 x 2 3/4 DSP
Banner 3 x 1/2 Silver Glimmer Paper
Ink Colors: Mossy Meadow
The greeting is from the Crafting Forever Stamp Set – just perfect for this occasion! It is cut with 1 1/2 circle punch then layered onto card cut with the Timeless Label punch; attached together with some Multipurpose Liquid Adhesive then onto the notepad with a couple of Stampin’ Dimensionals. The leaves are cut with the Leaf Punch and a Rhinestone Basic Jewel to finish.
I think I made about 30 in all and my ladies were thrilled with them – you can’t say thank you too many times!

Mossy Meadow base and Soft Seafoam layer
Now you might have different size notepads – my tip is to measure the length and the width then add 3/4″ for attaching at the back then add the thickness of the of notepad.
If you want to create this decorated notepad all the supplies are available 24/7 in my on-line – just click a picture and it will take you right there, just order what you need. Please use the Host code at checkout so that I can send you a thank you for shopping with me. (it is up there on the right just under the pink purse) Thank you for choosing me to be your demonstrator – your orders mean so much to me 🙂
Thank you for stopping by – I hope you like today’s project – please let me know by hitting the LIKE button or in a comment ~ by using that little box at the end of this post. You can subscribe to my Facebook page here!
If you are in need of any stamping supplies, I would love to be your demonstrator. Just click on the Shop Now button on the right side of my page and go directly to my online store.
Give me a shout if you need any more information or want to book a class or a party!
Happy Stampin’
 If you’d like any of the supplies, to shop, or to get a catalog, please feel free to contact me, and if you’re thinking of joining Stampin’ Up! and my team I’d most definitely like to hear from you

