
Welcome to my Corner of the World
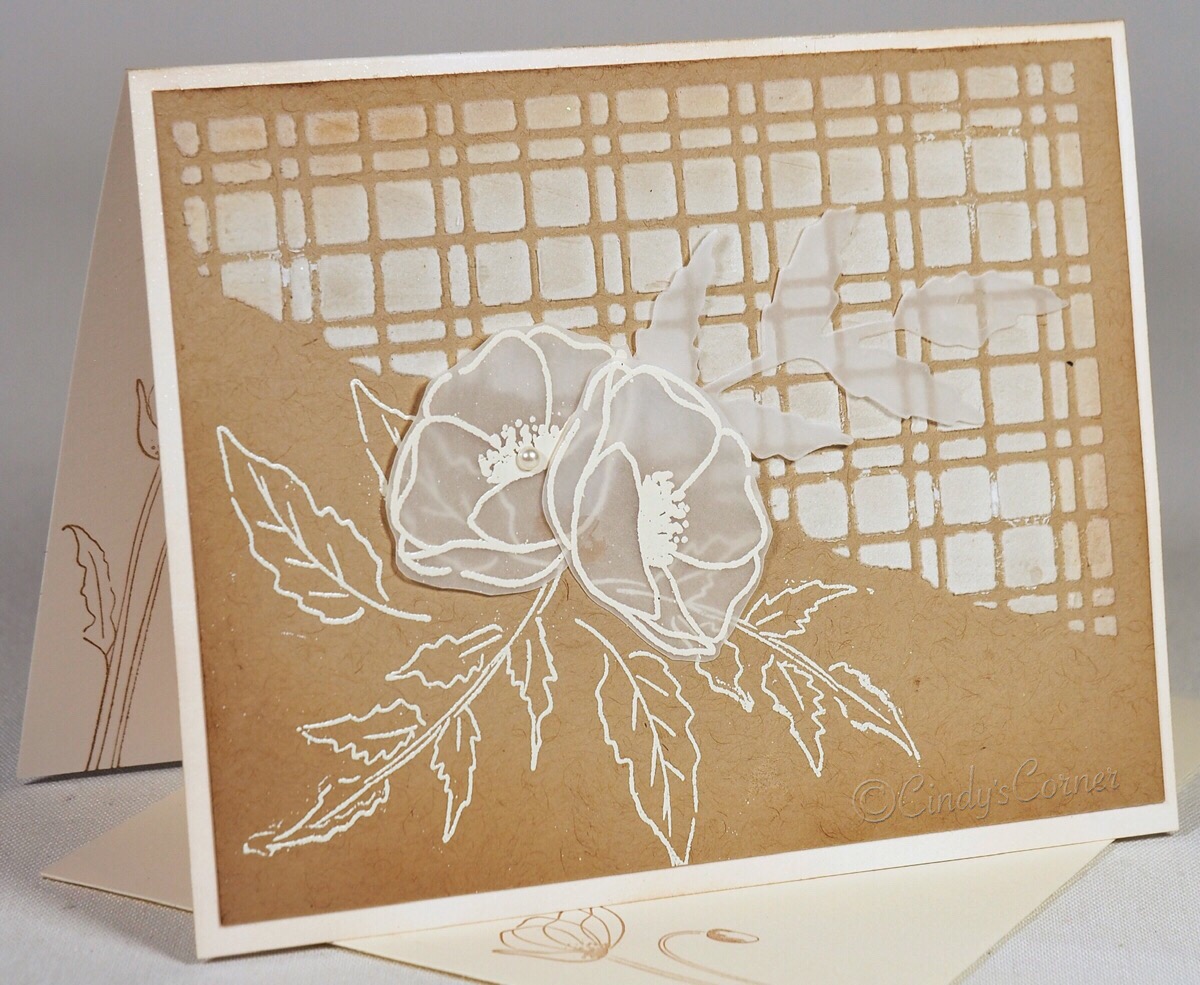
At a recent class I was asked by my card crafting ladies to share how to use the two types of Embossing Paste that Stampin’ UP! offer. It is a fun product to work with and while you can use any of the ready made masks/stencils available in the catalogs, it is fun to make your own! I used the Split Card Texture Dies to create mine then added some heat embossing on vellum and a little vintage’ing as well – so today’s card is packed with techniques!
- Base Card: 8 1/2 x 5 1/2 Very Vanilla Thick Card ~ scored @ 4 1/4
- Layer 1: 5 1/4 x 4 Crumb Cake Card
- Ink Color: Versamark with White Embossing Powder and Crumb Cake
There are two types of Embossing Paste, a matt and shimmery version, I used the matt one for this card and it would work equally as well with the shimmery version!
Using a piece of scrap card I die cut my stencil, then firmly fixing it to my work surface with the Crumb Cake layer underneath and using a Palette Knife to spread the Embossing Paste ~ it is a bit like buttering bread or frosting a cake, very quick and simple to do. Once this was done I removed the stencil immediately and set it aside to dry – this only takes about 10 mins and you can always hurry it along with a Heat Tool.
Remember to keep a pan of warm soapy water and some paper towels handy when you use the Embossing Paste – it helps with clean up!
While the embossing paste is drying I stamped and embossed a couple of poppies from the Peaceful Moments Stamp Set then cut with the Poppy Moments dies. Once dry I was able to stamp and heat emboss some leaves onto the Crumb Cake Layer, before adding some Crumb Cake ink with a Blending Brush to soften the edges and give a bit of a vintage look.
I have a series of video’s on using embossing paste, you can check them out here 🙂
Check out how I use my Blending Brushes
Once assembled I attached the vellum flowers with Mini Glue Dots and added a couple of Pearl Basic Jewels to finish off.
I hope you enjoyed the card and techniques I shared with you today, I love what I do and spend many hours working on designs, new projects, new ideas and much more. Don’t forget to be a subscriber on the blog by clicking the blue follow button on the top right and my You Tube Channel so that you get all the projects.
If you want to create this card all the supplies are available 24/7 in my on-line store – just click a picture below and it will take you right there, just order what you need. Please use the host code at checkout so that I can send you a ‘thank you’ for shopping with me ( the code is up thereon the right, just under the pink purse)
Product List
")


")


Thank you for choosing me to be your demonstrator – your orders mean so much to me 🙂
My Basic Tool Kit
Here are a few of my favorite things 🙂
Product List

|

|

|

|

|

|

|

|

|

|

|

|
Thank you for stopping by, please let me know you visited by hitting the LIKE button or in a comment, by using that box at the end of this post. You can subscribe to my FaceBook Page here.
If you are in need of any stamping supplies, I would love to be your demonstrator. Just click the SHOP NOW button on the right side of my page and go directly to my on-line store.
Give me a shout if you need any more information or want to book a class or a party!
Happy Stampin’


