
WOW – 650 blog posts since I first started back in July 2013 – so today is a double celebration! In the early days my posts were few and far between – often times I could not think of what to share, but these days I try very hard to post every other day as well as share video tutorials thru my You Tube channel.
I appreciate you following me, liking my posts and more importantly making comments – it just lets me know that you are all out there and I am not just talking to myself, so please ‘comment ‘ and ‘ like ‘ away – I truly appreciate your giving me some of your time!
Now – back to business…………….. I am not a great one for going onto Pinterest – not that I don’t love the whole concept but I loose track of time and suddenly 2 or 3 hours have passed and I have little to show for it!! So I ration myself ~ maybe for about 30 mins or so.
One of the new Stampin’ UP! stamp sets is called Dandelion Wishes featuring the lovely wispy seed heads left behind once the flower has died off. It is oh! so very pretty as a flower but I saw it on Pinterest used to show a firework display and the idea just blew my mind away…………. so it is my July 4th celebration design for this year.
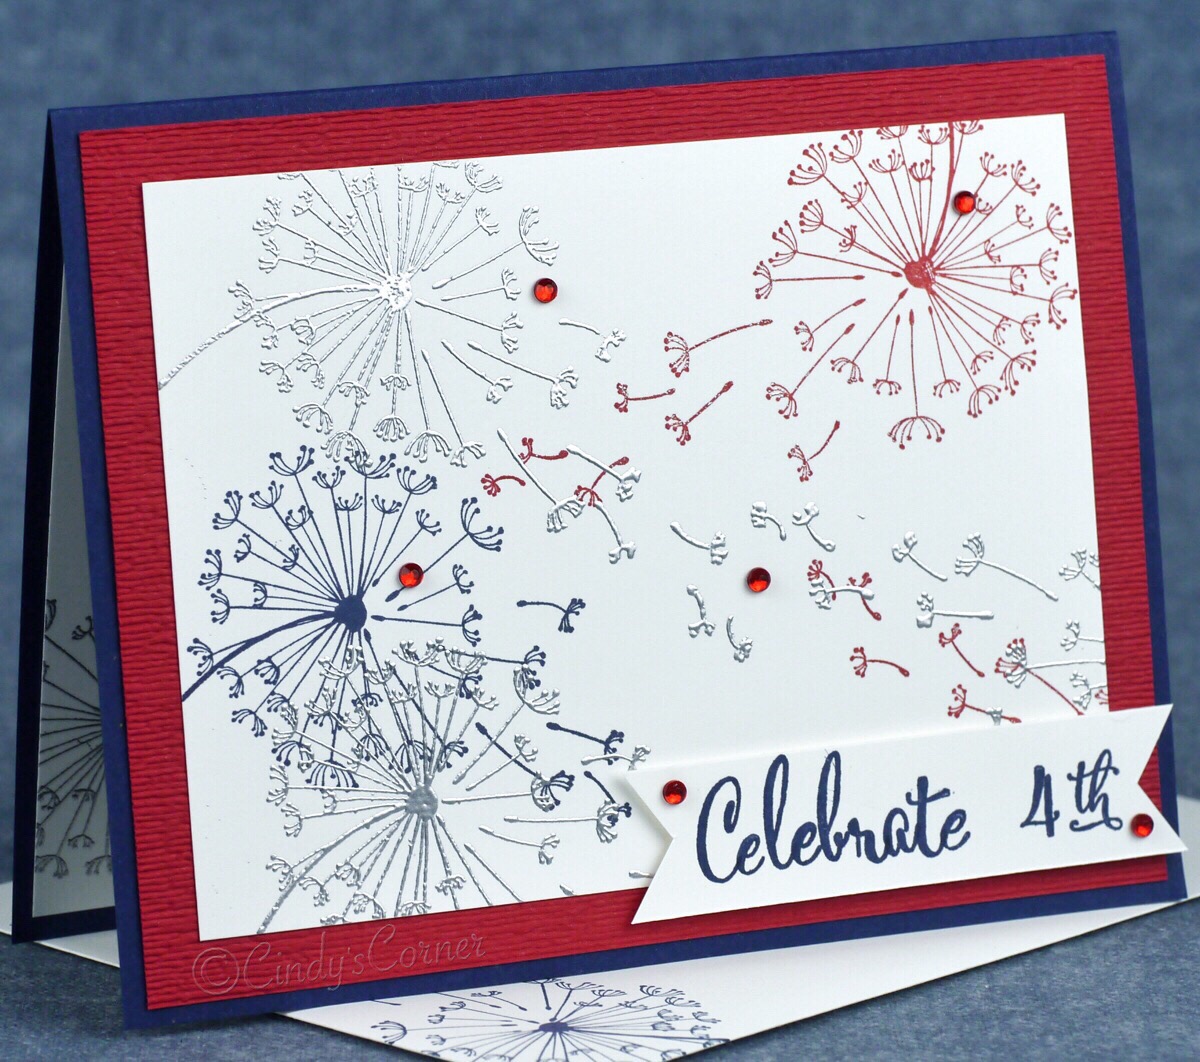
Card base: 8 1/2 x 5 1/2 Night of Navy Card ~ scored @ 4 1/4
Layer 1: 5 1/4 x 4 Real Red Card run thru the Big Shot with the Subtle Embossing Folder
Layer 2: 4 3/4 x 3 1/2 Whisper White Card
Ink Colors: Night of Navy, Real Red and Versamark
I used Silver Embossing Powder to give my fireworks a bit of dazzle and then topped the whole thing off with some Red Rhinestone Basic Jewels……………….. just love it!
Unusually for me I used a second stamp set called ‘Make a Difference’ – this is an alphabet set of 143 pieces with upper case as well as lower case letters, numbers, punctuation marks and some useful phases such as ‘handstamped by ‘ and ‘handcrafted just for you’. I needed a short phase for my card and decided to use it to create the banner. This is the second time I have used this set – the first was not so successful, this time I decided to try a different tack and was much happier with the process and the result……………… so here is a little video sharing a few hints and tips.
You should add this to your wish list – you can make just about any greeting you could possibly think of !! Did you see my spelling error – that is why I suggest you write the word down on scratch paper first then use it to make sure you spell your message correctly!!
Thank you for stopping by – I hope you like today’s project (sincere thanks to the person who had the original idea) – please let me know in a comment ~ by using the box at the end of this post. You can subscribe to my Facebook page here!
If you are in need of any stamping supplies, I would love to be your demonstrator. Just click on the Shop Now button on the right side of my page and go directly to my online store.
If you want to create this card all the supplies are available 24/7 in my on-line – just click a picture and it will take you right there, just order what you need. Please use the Host code at checkout so that I can send you a thank you for shopping with me. (it is up there on the right just under the pink purse)


Give me a shout if you need any more information or want to book a class or a party!
 If you’d like any of the supplies, to shop, or to get a catalog, please feel free to contact me, and if you’re thinking of joining Stampin’ Up! and my team I’d most definitely like to hear from you


Congratulations on the 650th accomplishment blog!!
LikeLike
thanks so much Siets {hugs}
LikeLike