
Welcome to my Corner of the World
Stampin’ UP! has so many beautiful decorative papers available to us papercrafters. The Peaceful Place Specialty Designer Paper has some really stunning images that just cry out to be the center piece of your Christmas Cards.
As I explain in the video, there is one design in the pack that has the same image 4 times on one sheet of 12 x 12, creating a sheet 6 x 6 which I was not sure what to do with. I decided to use it to create 2 cards using a technique I call a Layered Panel – this post explains how I work out the cutting and sizes of layers to create 2 different layouts.
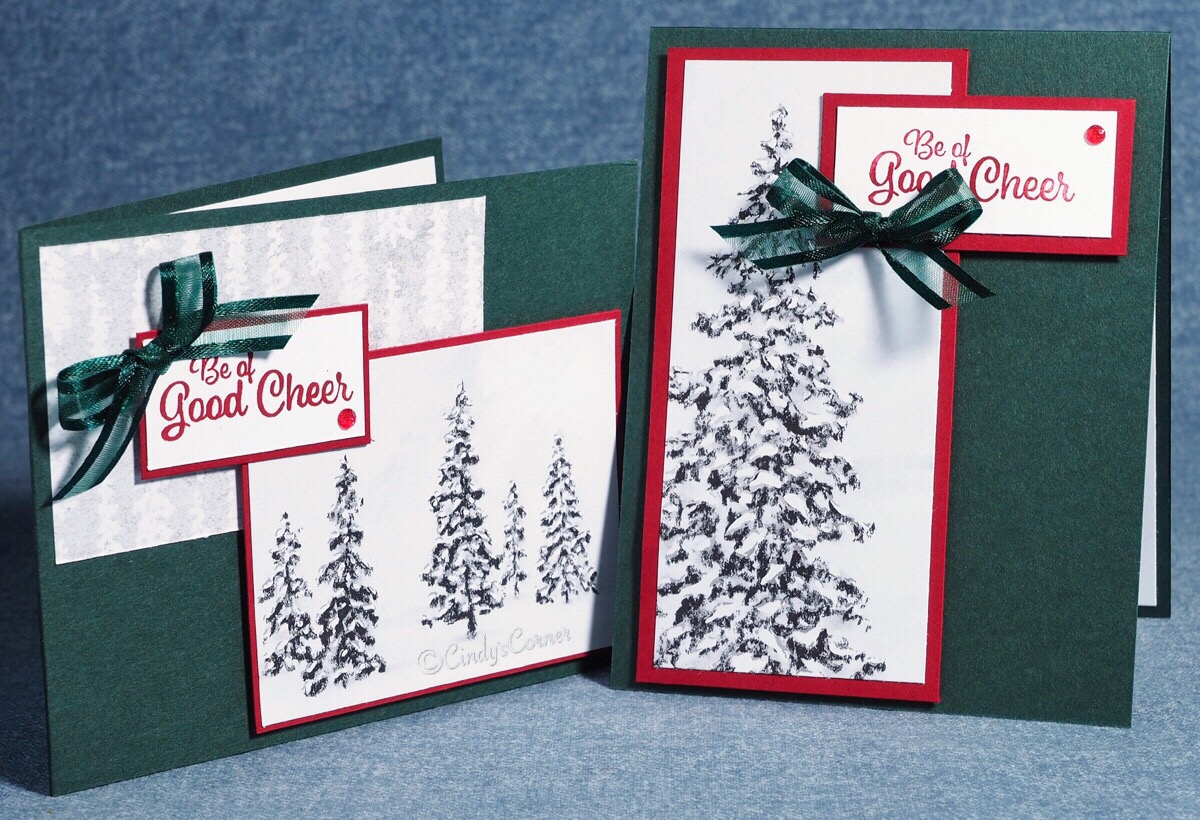
The greeting is from the Holly Jolly Wishes Stamp Set and I have used exactly the same colors as well as the Evening Evergreen Open Weave Ribbon and Wonderful Gems on both cards so you to can create similar cards of your own. I would strongly recommend you use the Stampin’ UP! Paper Trimmer – it will make it so much easier for you to make those accurate cuts.
Check out another card made with the Holly Jolly Wishes Stamp Set
Kick back and enjoy the video………………………….
- Base Card: 11 x 4 1/4 Evening Evergreen Card ~ scored @ 5 1/2
- Layer 1: 5 1/4 x 2 1/4 Cherry Cobbler Card
- Layer 2: 5 x 2 Peaceful Place Specialty Paper
- Layer 3: 2 1/4 x 1 Basic White Card layered onto 2 x 1 1/4 Cherry Cobbler Card
- Ink Color: Cherry Cobbler

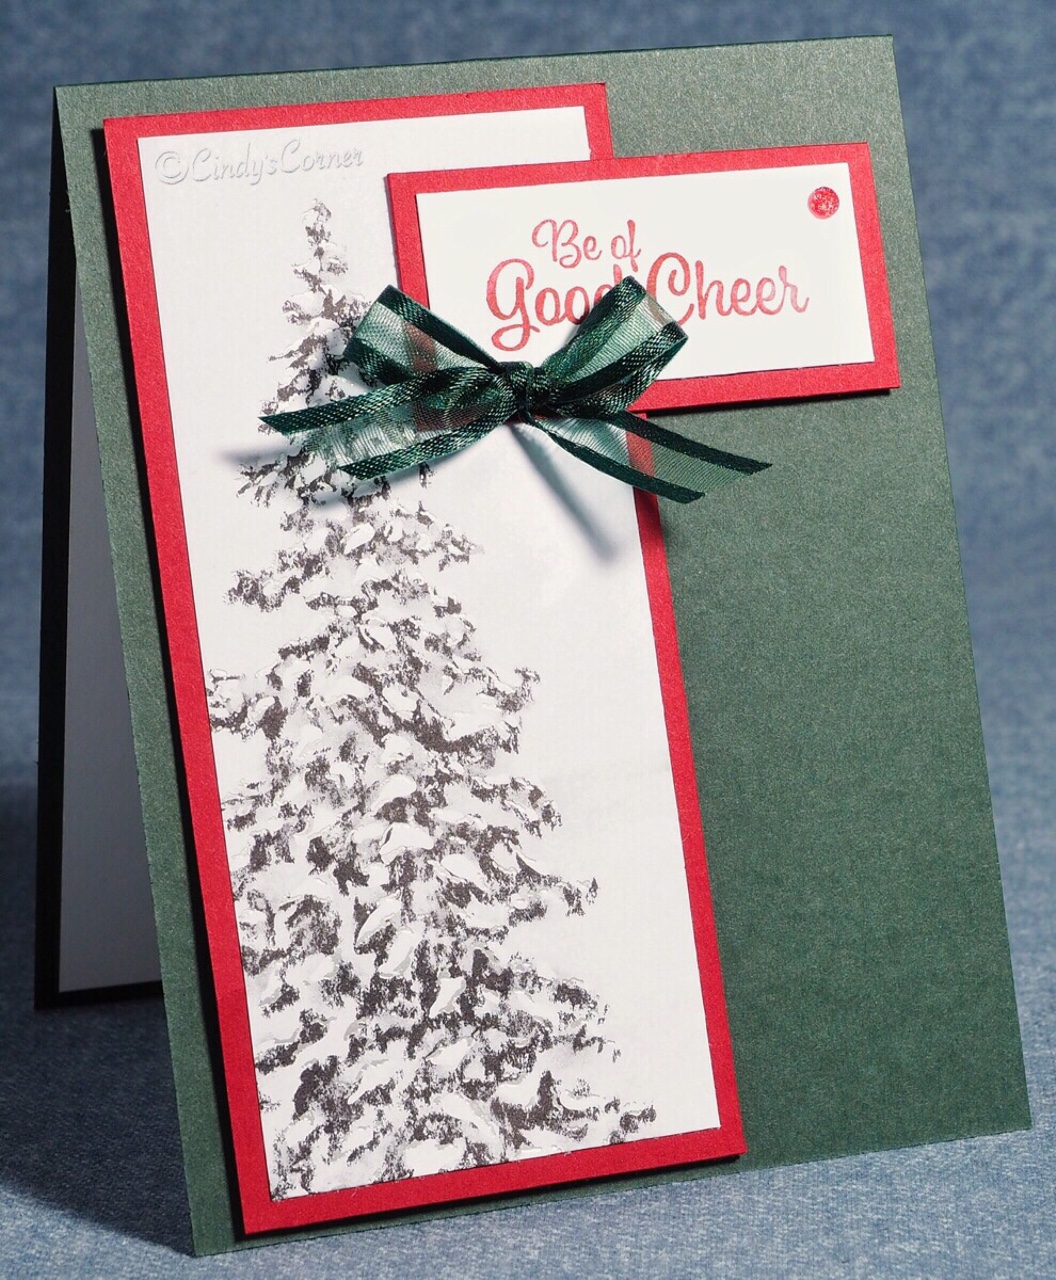
Base Card: 11 x 4 1/4 Evening Evergreen Card ~ scored @ 5 1/2
Layer 1: 4 x 3 Cherry Cobbler Card
Layer 2: 3 7/8 x 2 7/8 Peaceful Place Specialty Paper
Layer 3: 1 7/8 x 1 Basic White Card layered onto 2 x 1 1/8 Cherry Cobbler Card
Layer 4: 4 x 2 1/8 Peaceful Place Specialty Paper
Ink Color: Cherry Cobbler
I hope you enjoyed the technique and cards I shared with you today, I love what I do and spend many hours working on designs, new projects, new ideas and much more. Don’t forget to be a subscriber on the blog by clicking the blue follow button on the top right and my You Tube Channel so that you get all the projects.
If you want to create this card all the supplies are available 24/7 in my on-line store – just click a picture below and it will take you right there, just order what you need. Please use the host code at checkout so that I can send you a ‘thank you’ for shopping with me ( the code is up thereon the right, just under the pink purse)
Thank you for choosing me to be your demonstrator – your orders mean so much to me 🙂
Product List
")


 Specialty Designer Series Paper")

 Open Weave Ribbon")
My Basic Tool Kit
Here are a few of my favorite things 🙂
Product List


Thank you for stopping by, please let me know you visited by hitting the LIKE button or in a comment, by using that box at the end of this post. You can subscribe to my FaceBook Page here.
If you are in need of any stamping supplies, I would love to be your demonstrator. Just click the SHOP NOW button on the right side of my page and go directly to my on-line store.
Give me a shout if you need any more information or want to book a class or a party!
Happy Stampin’


